Salamander Designs Archetype 2.0 Rack + One Extra Shelf

tmallin

WBF Technical Expert
May 19, 2010
970
387
1,625
71
Chicagoland

My Goals for an Equipment Rack


I'm not pretending that this is the best rack out there in any category. But it happens to meet my needs and seems to me to represent an excellent balance of price versus performance.

For my purposes an audio equipment rack should:

  • provide a stable platform for electronics, as in not being subject to rocking and being able to safely hold the weight of your components;
  • allow easy physical access to all sides of the components on the rack;
  • have easily levelable shelves;
  • accommodate and work well with accessory/aftermarket vibration-reducing products;
  • be reasonably attractive;
  • have low apparent high frequency resonance or ringing when tapped; and
  • be low enough in height to stay out of the way of the direct reflections from midrange and tweeter drivers as seen from the listening position.

Why a Low Rack Is Best for Me

Most of those desiderata should be clear enough except, perhaps for the last one. Long experience with audio room set up has made me a believer in the importance of getting the left and right sides of the room (as referenced by the positions of the stereo speakers) to be as close to mirror images of each other as possible. This helps create the best possible spatial presentation from stereo recordings both in terms of imaging and staging.

Both for expense and sonic reasons, I also find it best to avoid long runs of any kind of cable, be it analog, digital, interconnect, speaker, or power. In my smallish room, the only place for the equipment rack which keeps the left and right sides of the room reasonably the same acoustically and keeps the cable runs all fairly short is to put the rack between and behind the two speakers.

Mapping the reflection points of the speakers as viewed from the listening position using a small flat mirror placed against the wall or against any side of components mounted on a rack centered on that wall will usually show that this area behind and between the speakers near the center of the room is not a spot of first reflection. However, experience has taught me that for the most solid center imaging it is best to keep the equipment rack shelves low enough so as not to be at ear/eye level when in the listening position. Whether this is an acoustical effect or is also at least partially a psychoacoustical effect, it seems that a blank wall space is best for the center, rather than the chasses of electronics or the shelves of a rack.

While there are racks which can accommodate massive built-in or placed-atop passive or active suspension tables, such racks get very tall or wide with even a few shelves. If the rack is more than about 30 inches wide, then in my room and many others a centered rack may occupy part of the area of first reflection of parts of the speaker on the wall behind the speakers as viewed from the listening position when the speakers are placed so as to subtend the standard 60-degree angle as viewed from the listening position. Thus, if a rack is constructed in two side-by-side sections so as to keep each tier lower, parts of the rack and components on it will most likely occupy the first-reflection positions of the speakers on the wall behind them as viewed from the listening position.

An alternative is to place all the components on or very near the floor, suspending them on nothing higher than a so-called amp rack, just a few inches high. I have tried that in the past and sonically it can be a truly excellent solution. The problems with such arrangements are that you soon run out of floor space; they create a "messy" appearance in the listening room; they tend to need some longer runs of cabling; they involve a lot of bending to operate controls, insert discs, etc.; and they make physical navigation to gain access to the operating controls or rear panels of components a bit dicey as you attempt to avoid stepping on components or cables.

Another alternative is to use one or two such low stands and just stack multiple components atop each other. I've tried that sort of arrangement also. In some instances, with equipment having very sturdy casework, such as with amp stacks (e.g., four Bryston 7B-SST amps in a stack) it can work well indeed without hell to pay in terms of electromagnetic interference or excessive heat build up. However, such stacking is not optimal if your set up goals include maximally isolating each component from internally and externally induced vibrations. In addition, less sturdy components must be sited toward the top of a stack.

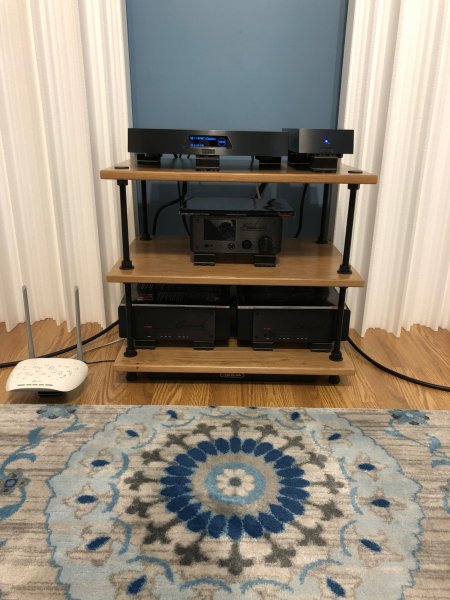
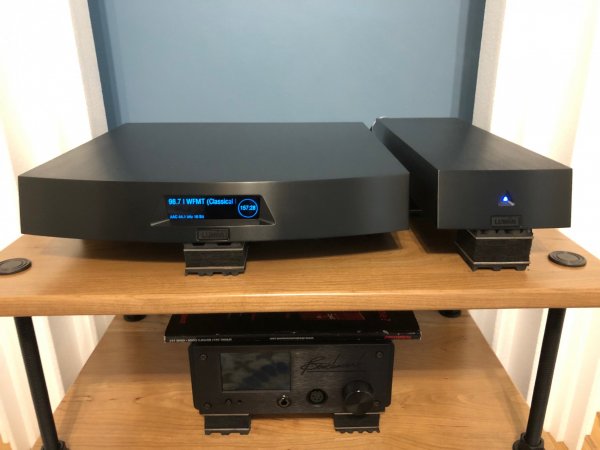
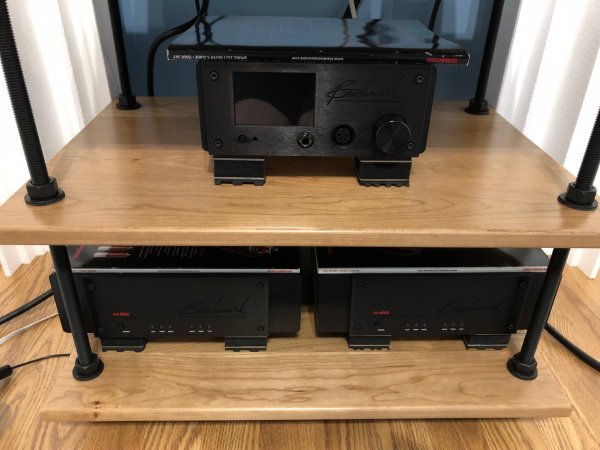
The best solution I've found for this room is to keep the electronics as simple as possible, reducing to a minimum the number of chassis boxes needed, and then using a single sturdy rack to hold the electronics, mechanically isolating each component from the rack with the properly specified aftermarket footers, my current favorite being the A/V RoomService EVPs. This short Salamander Designs Archetype 2 rack meets this goal very well.

Here are a few pictures showing the assembled rack loaded with my equipment. The post which follows discusses my hints on how best to assemble this rack.


Attachments

  • IMG-7011.JPG
    IMG-7011.JPG
    743.9 KB · Views: 13
  • IMG-7014.JPG
    IMG-7014.JPG
    398.1 KB · Views: 10
  • IMG-7015.JPG
    IMG-7015.JPG
    605.8 KB · Views: 11
Last edited:

tmallin

WBF Technical Expert
May 19, 2010
970
387
1,625
71
Chicagoland
Assembly Notes

Since this is just the shorter version of the Salamander Designs 3.0 rack I had before, this went together very quickly. It's a great design, shipped flat-packed with easy assembly, requiring only a 15/16" wrench and small bubble level, both of which are included.

A few reviewers of such racks have found them unstable or unsteady. But with both my former taller rack and this one, as long as you follow the instructions, once everything is locked down tight with the provided wrench, I cannot imagine that it is unstable or wobbly in any way. Of course, my equipment is fairly light in weight, so things may be different if you are trying to mount a 100-pound-plus turntable on the top shelf.

Both my Salamander Designs racks are stable and rigid. No, they are not as rigid as some others with far larger metal shafts and two or four inch thick shelves (e.g., the Mapleshade Samson), but this Salamander Archetype is a sweet spot in the price/performance continuum and doesn't dry up the bass the way some ultra-rigid racks can. For isolating equipment from vibrations, I don't rely on massive rack structures. Instead, I use the small, easy to use, A/V Room Service EVPs under each piece of electronics. For my detailed discussion of anti-vibration equipment for audio systems, and especially these EVPs, see this thread.

Here are my notes elaborating on the instructions which come with the Salamander Archetype racks:

  • Assemble the rack in place where it will be used. This will ensure that all four feet are firmly planted on the floor during assembly, regardless of how level your floor is. Use a ruler and measuring tape or laser measuring device to position the rack how you want it with respect to the wall behind it and the adjacent side walls. Since I wanted my rack centered, I made sure that the distances from the side of the shelves to the nearest side wall were equal. The easiest way to measure the position of the rack with respect to the walls is to place it approximately where you want it, install the bottom shelf, and approximately level that shelf, only hand-tightening the nuts. Then use a ruler, tape measure, or laser measuring device to measure from the edges of that bottom shelf to the nearest wall.
  • I find it helpful to screw on the bottom shelf nuts first from the bottom of the shafts, then add the rubber feet, and then adjust the bottom nuts to be just above the rubber feet. This mode of assembly saves the time of twirling the bottom nuts all the way down the threaded rods. From then on, add bottom washers, shelves, top washers, and nuts from the top of the shafts.
  • Pay particular attention to the instructions when adding the top shelf. To allow flush mounting of the top flat nuts, make sure the shafts, at their highest, are flush with the top of the shelf. If the shafts stick up beyond the top of the top shelf, you won't be able to screw the top nuts down flush with the top surface of the top shelf.
  • To unscrew the flat top nuts from the top shelf to adjust the leveling of the top shelf, you MUST FIRST loosen the nuts on the bottom of the top shelf.
  • For other shelves, you loosen the top nut first, then adjust the level of the shelf using the bottom nuts.
  • Don't use the wrench until all the shelves are attached, spaced as you want them, and level. Then start tightening with the wrench from the bottom shelf up. On all shelves except the top shelf, you tighten the nut above the shelf. For the top shelf, you tighten the nut below the shelf. Retighten these nuts with the wrench after a week, then after a month or two since the wood will shrink a bit and the rubber washers will compress.
  • If you are installing the rack near the wall behind it as I did, or otherwise in tight quarters, I strongly recommend loading each shelf with components as you assemble the rack from the bottom up. This will allow much easier access, viewing, measurement and adjustment of position of components on the shelves, insertion of accessory footers between components and shelves, and attachment of cables to equipment. This is especially so if there is not much space between the shelves, as may well be the case when you add additional shelves as I did.
Even though I added an additional shelf, I still ended up with about nine inches of clearance between the shelves, which was much more than the six inches or so I had with the prior 28"-tall five shelf rack. The extra space allows much more air circulation, keeping the equipment much cooler when always on.

With the four-nut support, it is easy to get the bubble level to show that the shelf is level along the front, rear, and side edges, as well as in the middle. I have not had any of my shelves exhibit any warping. Once the shelf is shown to be level, hand tighten the top nuts on that shelf. Only use the wrench once the stand is fully assembled.
 

About us

  • What’s Best Forum is THE forum for high end audio, product reviews, advice and sharing experiences on the best of everything else. This is THE place where audiophiles and audio companies discuss vintage, contemporary and new audio products, music servers, music streamers, computer audio, digital-to-analog converters, turntables, phono stages, cartridges, reel-to-reel tape machines, speakers, headphones and tube and solid-state amplification. Founded in 2010 What’s Best Forum invites intelligent and courteous people of all interests and backgrounds to describe and discuss the best of everything. From beginners to life-long hobbyists to industry professionals, we enjoy learning about new things and meeting new people, and participating in spirited debates.

Quick Navigation

User Menu

Steve Williams
Site Founder | Site Owner | Administrator
Ron Resnick
Site Co-Owner | Administrator
Julian (The Fixer)
Website Build | Marketing Managersing