How to: In-Wall Wiring for Your Home Theater
Part 1: Instructions for Dropping Wiring In-Wall From an Attic
Part 2: Dealing with a Cross Brace in the Wall
Part 3: Dealing with Inaccessible Places in the Attic
Part 4: Running Wire From Baseboards up to Wall-Mounted Speakers
Part 5: Dropping Wire in a Wall With Insulation
Part 1: Instructions for Dropping Wiring In-Wall From an Attic
Part 2: Dealing with a Cross Brace in the Wall
Part 3: Dealing with Inaccessible Places in the Attic
Part 4: Running Wire From Baseboards up to Wall-Mounted Speakers
Part 5: Dropping Wire in a Wall With Insulation
A few years ago I visited an old friend for the first time in a many years and couldn’t help but notice how poorly her home theater system was set up. The worst part was the speaker wires hanging on the wall between the receiver and the rear speakers. Yes, hanging! I timorously asked her, “Um, do you like having those wires draped across the wall like that?” She replied with a blank expression, ”Do I have a choice?”
The answer, of course, is a resounding, “Yes!”
Certainly no one likes to see speaker wires hanging on the walls or strung out across the floor. However, one of the biggest challenges in setting up a home theater can be getting the wire to the back of the room for the rear speakers, especially if your house is pre-existing (as opposed to new construction). But if you have an attic (or crawl space) big enough to move around in, it’s not terribly hard to run your rear speaker wires in-wall and get a clean appearance in your room. This is the first in a series of articles providing a step-by-step on how to accomplish retro-wiring not only for rear speakers, but any kind of cabling inside the walls you might need for your home theater.
First, let’s take a look at the tools and supplies we’ll need. Naturally, there are a lot of pricey specialty tools that professionals use, but I don’t expect the weekend installer will want to drop $100 or more on exotic devices that he might use once every 5-10 years. As such, some of the “tools” are items we’ll “manufacture” that can hopefully accomplish the same thing.
Tools
- Metal coat-hangers. Preferable one for each location where you’ll drop a wire, hooks cut off, straightened, and bent into an “L”.
- An appropriate pull string. I recommend a 12-ft. length of weed eater line. Light-duty .065 line works fine. (If your ceilings or taller than 8 ft., add 4 ft. of weed eater line to the ceiling height.)
- A short 1-ft. length of light-duty chain. You can find something appropriate on the hardware aisle at most hardware stores, something used for hanging planter baskets, etc. The chain should be a ferrous metal. We’ll show a picture of a fully prepared pull string /chain later.
- #2 Phillips screw driver.
- A pair of pliers.
- Pencil.
- Electrical tape.
- Extension cord.
- Assorted drill bits.
- Electric drill. I suggest a heavy-duty model with a 1/2” chuck and side-handle, to better wrangle the aggressive auger bits we’ll be using.
- A couple of 1” x 12” boards about 3 ft. long. Optional, but highly recommended.
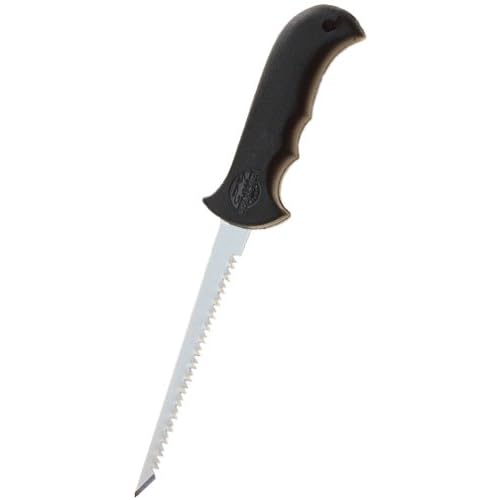
- Drywall saw.
- Three-way electrical tap.

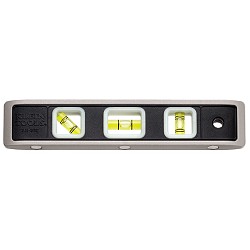
- A small “torpedo” level.
- An electronic stud finder never hurts.

- Work light with built-in clamp.

- 3/4” auger bit. Preferred over a similarly-sized paddle bit. Augers (also called wood-boring bits) are much more aggressive than paddle bits. Plus they cut faster and last infinitely longer.

- 18” drill bit. Something in the 1/4 - 3/8” range. Typically not needed for attic wiring, but folks running their wiring through crawl spaces will need this. Alternately, an 18” drill extension will work, but they are more expensive than a long drill bit.

- 8" Side cutters.

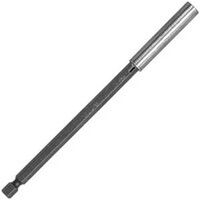
- A telescoping magnet “antenna.” Commonly available at auto parts stores.

- A spool rack (a.k.a cable caddy) is handy. If not, a piece of 1/2” conduit pipe between a couple of chairs will work.


Supplies
- Appropriate cabling. All wiring should be rated for in-wall installation.
- Three old work electrical boxes (or more as needed for 6.1 or 7.1 installations). These may be considered optional if you intend to bring your cabling straight out of the wall, although I would strongly recommend one at least for the equipment location, where lots of wires will be coming in.

If you’re pulling in a lot of wiring to the equipment location, like coax for antenna or satellite receivers, telephone line for the same, wiring for second- or third-zones, etc. you might want to use a double-gang old work box instead.

- Covers of your choice for the old-work boxes – more on that at the end of Part 1.
Last edited:


") It would be a real bummer to cut a hole in the wall only to find out you couldn’t make a drop there for some reason.
It would be a real bummer to cut a hole in the wall only to find out you couldn’t make a drop there for some reason.


![11703d1232173819-how-wall-wiring-your-home-theater-bulk-cable-wall-plate-r.jpg]](http://www.hometheatershack.com/forums/attachments/home-theater-design-construction/11703d1232173819-how-wall-wiring-your-home-theater-bulk-cable-wall-plate-r.jpg])