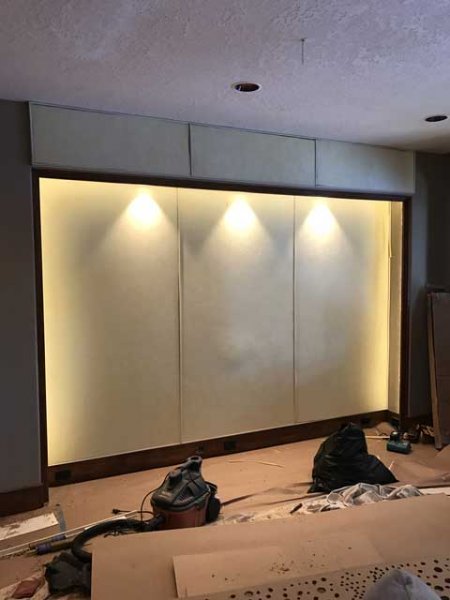
Well done! Very impressive...no techie here, so will only say it certainly seems like a very solid solution. I know you'd rather none of this happened, but you've got a remodeling story to tell now. And you can tell it in good humor and in the comfort of luxury pretty soon when its all done.
Bob's New Listening Room and System
- Thread starter Bobvin
- Start date
You are using an out of date browser. It may not display this or other websites correctly.
You should upgrade or use an alternative browser.
You should upgrade or use an alternative browser.
It is a perfect solution - but you should lightly sand the tube around the holes to get a flat surface. People use ABS join solvents even in pressurized tubes, in a drain it is more than adequate.
Thanks for the vote of confidence... I did make sure the surface was flat before gluing up the patch. I joined a lot of 3" PVC couplings to flexible tubing working on my water feature when living up in Seattle. PVC solvent in that case, for lines under pressure. As you say for a drain with no pressure this should be more than enough—not sure what plumbing code would say about it though. Seems a Ferco coupler would create two possible sources of leaks, one at each end. I did force a little bit of silicone caulk into the holes and let it set up before applying my patch. After the solvent setup I put a little bead of silicone along the edges of the "c" for good measure.
I will always have a little anxiety now when I hear that toilet get flushed.
Steve Williams
Site Founder, Site Co-Owner, Administrator
Bob
out of curiosity why did the job of repairing that leak fell to you
Hi Steve, my plumber would be at least two weeks out, and his solution would've required opening up a lot more of the ceiling. I'm reasonably handy, and rather than wait I decided it was something I could resolve myself with a little creativity.
I've used some small fittings on irrigation pipe which solvent weled onto the side of the main pipe in the same way (to create a T for line to a sprinkler head) and those fittings were secure to 100 psi. The drain pipe has no pressure at all.
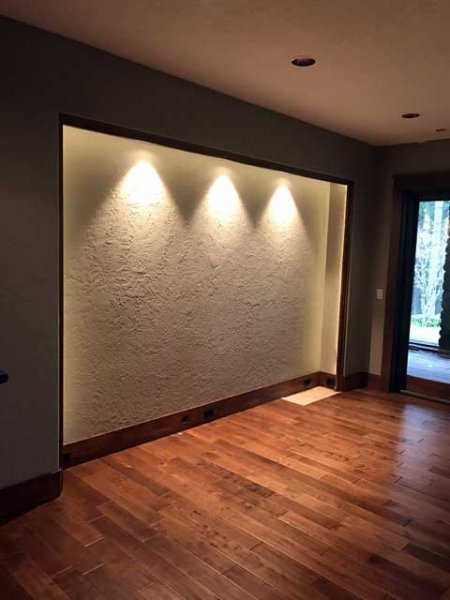
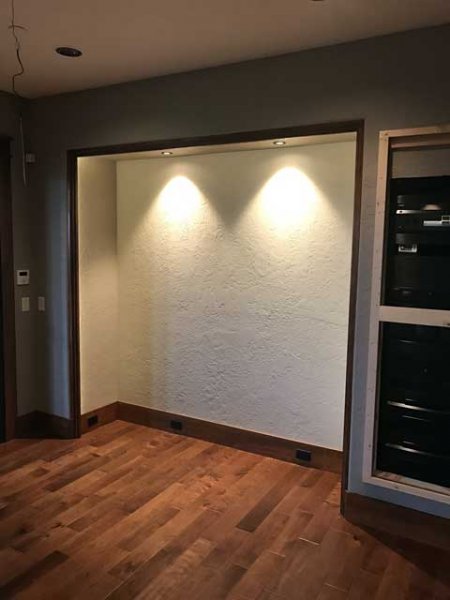
An exciting week ahead... finally the crew from NYC is here and will install custom panels and the fabric-wall. I've been working to get the LED tape lighting installed around the perimeter of the recessed niches/alcoves on both sides of the room, and I've finally received some of the 2700°K LED lighting trims (at least the 2.5" trims for the niches). Together with the tape lighting my vision is coming together, and ultimately I'll have ability to create multiple "moods" for the room.
Gear will go on the left wall, right side will have custom cabinet for vinyl.
While the hardwoods are actually very nice, I'll be covering them with wall-wall wool carpet. Earlier in the thread you can see the wool carpet—but this time we've decided to just go ahead and go wall-wall vs. making a big area rug like before. Being on the lower floor of the house, the dark flooring just exacerbates the cave like feel. Nice for a theater room, not so much for my listening space.


Steve Williams
Site Founder, Site Co-Owner, Administrator
All along on this custom room journey I've been wondering just what kind of custom panels will go behind the fabric wall. The acoustic firm described a custom "bad" panel so of course I visited RPG to look at their BAD panels. But their panels are 4" thick, and the panels specified are 1.2" thick? What the hell?
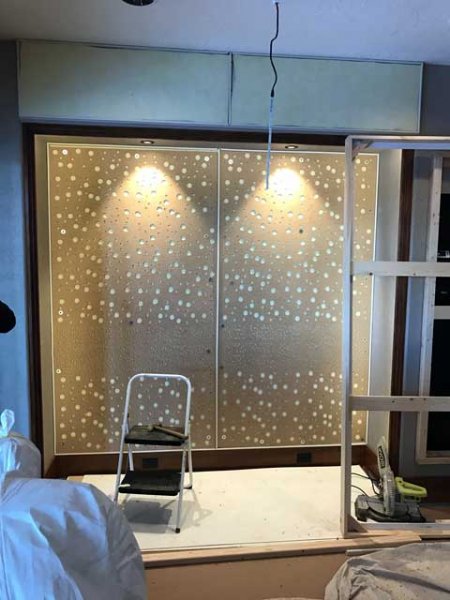
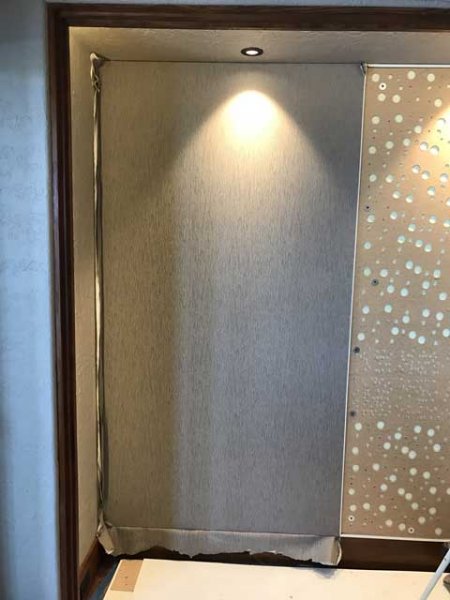
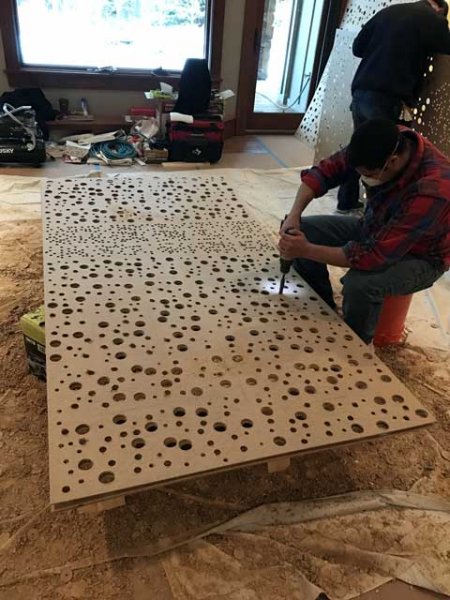
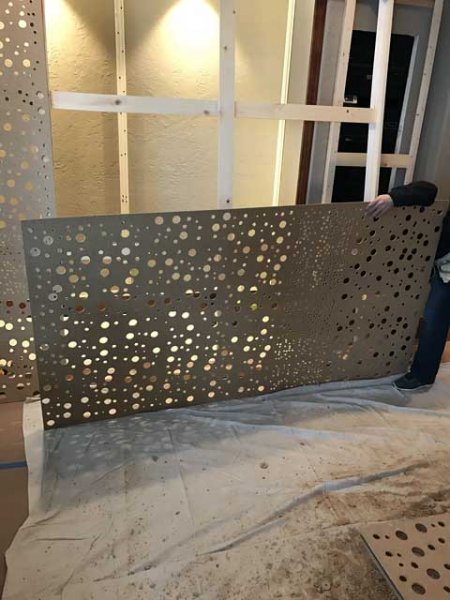
Now that the crew is here I see just how custom these panels are. Similar in principle to an RPG panel, but the acoustician actually specifies a custom pattern for the drillings and each panel is made specific for its location on the wall. Labor intensive for sure. I feel more confident now the room will indeed sound amazing when complete.
Now that the crew is here I see just how custom these panels are. Similar in principle to an RPG panel, but the acoustician actually specifies a custom pattern for the drillings and each panel is made specific for its location on the wall. Labor intensive for sure. I feel more confident now the room will indeed sound amazing when complete.
Hey Bob,
RPG can custom size the BAD panel for the customers needs. I have some that are 3" thick, 4" thick and 1" thick and in different lengths and widths.
Scott
RPG can custom size the BAD panel for the customers needs. I have some that are 3" thick, 4" thick and 1" thick and in different lengths and widths.
Scott
Hey Bob,
RPG can custom size the BAD panel for the customers needs. I have some that are 3" thick, 4" thick and 1" thick and in different lengths and widths.
Scott
But I doubt they custom drill the perforations? There are several different templates that have been provided by the acoustician depending on where in the room the panel is located, as well as height on the wall, e.g. there is different hole sizing and spacing pattern for ear level, and different pattern for panels on the rear wall vs. side walls.
I see in your avatar pic what look like RPG BAD arc panels. How do you like the results of using the RPG kit?
I have 5 Modex Plates up front and the rest of the panels are flat BAD panels(about 19). I worked with my acoustician for several months and absolutely love the results of the RPG treatments.
I'm told the drilling patterns are different for each project, and in my case we're using some unique spec 1" fiberglass with the drilled hardboard applied on top. The drilling pattern is a programmatically generated repeating pattern of large 1.5" holes, 1", 3/4", and 1/2" holes. Centered on 39" ear height, there is a band of holes about 15" wide that look to be 1/2", also in a programmatically generated "random" pattern.
There are four wall areas being treated this way—inside each of the niche/alcove areas, the back wall, and a wall mounted 7'x4' panel that will stand off the wall a little bit so that there can be a halo lighting effect created by a line of LED tape lights just inside the back periphery of the panel.
There will also be a suspended ceiling cloud that is 8'x10', and curtains across the windows/doors in front, across the stairs in back, and across the hallway to the wine cellar and bedrooms. The curtains in the rear of the room will be double sided and lined with 3 layers of SoundSense Lumitex fabric, the curtains across the windows will have just 1 layer of the Lumitex.
By Monday I should be able to post pics showing the completed panels/fabricwall portion of the project.


Bob, How many walls will receive Bonnie's Lumitex-lined drapes treatment?
The front wall, with the two glass doors and picture window, will have drapes with 1 layer of lumitex.
In the rear of the room, behind the listening position, both the left and right walls open to the house. Prior pictures in this thread show the back of the room, with the wide stairway flowing down into the room on one side, and the opening opposite that leads to the lower floor bedrooms (3), and which now includes my wine cellar.
There will be curtains which will draw across both openings in the rear of the room, and these drapes will be lined with 3 layers of the Lumitex. This will represent about 25% of each wall.
The back wall has the custom panels mounted behind the fabric-wall.
The panels look great - were they drilled in house?
Sadly, yes, drilled on-site. We'll be paying our house-cleaner extra for a deep-clean after installation is complete. The drilling created a nice layer of dust that now coats everything in the house. Wifey is not happy.
Sadly, yes, drilled on-site. We'll be paying our house-cleaner extra for a deep-clean after installation is complete. The drilling created a nice layer of dust that now coats everything in the house. Wifey is not happy.
Great that you manage to get people to carry such work - my usual woodworkers would probably refuse do it! What is the panel material?
The front wall, with the two glass doors and picture window, will have drapes with 1 layer of lumitex.
In the rear of the room, behind the listening position, both the left and right walls open to the house. Prior pictures in this thread show the back of the room, with the wide stairway flowing down into the room on one side, and the opening opposite that leads to the lower floor bedrooms (3), and which now includes my wine cellar.
There will be curtains which will draw across both openings in the rear of the room, and these drapes will be lined with 3 layers of the Lumitex. This will represent about 25% of each wall.
The back wall has the custom panels mounted behind the fabric-wall.
Interesting . . . so your room will not have the drapes covering entirely each side wall (as the drapes in Steve's room cover entirely each side wall)?
When measuring did Bonnie find that the left and right openings in the rear of the room were helpful in allowing bass waves to escape, which, if you had a completely sealed room, might otherwise have built up and caused greater low-frequency anomalies?
Interesting . . . so your room will not have the drapes covering entirely each side wall (as the drapes in Steve's room cover entirely each side wall)?
That's right Ron, my room is very different from Steve's room. Definately not a basic rectangle that can be 'sealed'. Only the front wall will have draps that can be pulled across the entire wall. As the view out the window is nice now — looking out to a mature stand of fir trees, when we thin and clear some trees Mt. Hood will be dead center in the window from the listening position. So there will be a lot of time the drapes will be partially opened. Bonnie said one highly refective wall could be dealt with. And the amount the curtains open and close will allow for some room 'tuning' as well.
When measuring did Bonnie find that the left and right openings in the rear of the room were helpful in allowing bass waves to escape, which, if you had a completely sealed room, might otherwise have built up and caused greater low-frequency anomalies?
Bonnie thought the front of the room, originally, measured out pretty good. The problems came as the volume increased, the echos and reflections from the open hallway started to cause what I call destructive interference.
There are a lot of parts — the guys just hung the ceiling 'cloud' this afternoon.
The overall solution will be written up by Bonnie when installation is complete.
Last edited:
Similar threads
- Replies
- 3
- Views
- 354
- Replies
- 1
- Views
- 826
- Replies
- 8
- Views
- 456
- Replies
- 5
- Views
- 342
| Steve Williams Site Founder | Site Owner | Administrator | Ron Resnick Site Owner | Administrator | Julian (The Fixer) Website Build | Marketing Managersing |


